Showing posts with label technique. Show all posts

Friday, February 08, 2008

Carving bowl rims

One of the most common questions I get asked about my kitchen-safe bowls is how I make the decoration around the rim. Many think I use a machine, and woodworkers sometimes think I use a chatter tool.

Neither are correct. I use a traditional woodcarving gouge, which when properly sharpened will cut nicely through hardwoods like maple and yellow birch. Normally I have the bowl mounted on the lathe with its outside surface facing me. But the three big bowls that I mentioned earlier today were only ever mounted the other way round, meaning that I had to work from behind the lathe. The easiest way I found to do this is to perch myself on top of the lathe. I felt somewhat like a gargoyle up there, but it gets the job done quite comfortably.

Bowling along

Cyndi left a comment on my last post asking for an update on progress with all those bowls that I am working on. I 'm pleased to say that I have been busy, too busy to blog apparently, and they have now all made it through step two of the process. They have now all had the outside of the bowl turned, sanded and the decoration carved around the rim. Here they are, stacked in boxes in my gallery, the only space I seem to have available at the moment:-

As you can see, there is quite a range of sizes here, from 4" to 17" diameters. So whether you want a bowl to snack on peanuts while you watch tv, or a salad bowl for a big dinner party, I expect to have something soon that will suit your needs.

You have probably noticed that the very small bowls and the two large bowls in the picture above have had their inner surface turned and sanded too, which is the third step in the process. I did all the small bowls one day when I had the lathe set up for another job (a fridge door handle shaped like a rolling pin!) and while the chuck had a small set of jaws installed, I decided to go ahead and turn all the bowls that would need that setup. You see, I like spending my time turning wood, not fiddling with machinery.

The three big bowls had to be dealt with slightly differently in that they were big enough for me to screw them to a faceplate, skipping step one, and doing steps two and three at the same time. Here is the last of the of the big bowls which is on the lathe at the moment, ready for final sanding and carving the rim decoration. It is a whopping 17" diameter and 5" deep, one of the biggest bowls I ever made.

Tuesday, January 22, 2008

Death row at Seafoam

This month I have been doing little else but turn bowls. I had accumulated over one hundred roughed out bowl blanks and they were beginning to swamp my storage space, so I thought it would be a good idea to take advantage of this quiet time of year to get them turned into finished bowls.

Unfortunately they didn't all make the grade. A couple had split while drying; possibly I had left them too thick, and they weren't able to warp as they dried, and the stress caused them to split apart. Another was an error on my part and the bottom of the bowl was too thin - so thin in fact that it was translucent. So these three bowls ended up on death row:

It is a shame that these bowls didn't make the grade, and I hate to destroy them, but when you consider the total number of bowls that I am working on, I don't consider it a bad loss rate. Some woodturners might salvage these bowls by filling the cracks with epoxy and decorative materials, but most of my customers are looking for practical bowls that can be washed in the sink and will last a lifetime, so I use robust materials and only permit minor defects in the wood.


That is the pile of bowls which I am working on. They have been roughed out and left to dry, and then go back on the lathe four times before they are finished. In the picture above they have all had the first step completed. I have turned a recess on the inside of each bowl's rim. This will allow me to grip the bowl securely in a chuck so that I can shape the outside of the bowl.

I am working on these bowls step by step, putting all of them through step one before moving on to step two. This makes for more efficient working, since each step requires a different set up of the chuck, and a lot of time can be wasted changing the jaws, so while I have it set for one job, that is all I will do, even if it does take a week or more to get through them.

Sunday, October 22, 2006

The stuff that salad bowls are made of

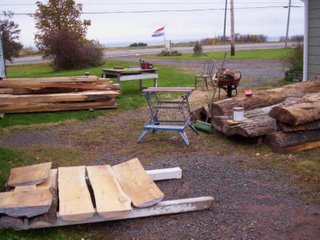
Big salad bowls are made from big pieces of wood. Acquiring this material is considerably more involved that driving to a wood supplier and throwing a few boards in the back of the car.

Earlier this year I purchased six big logs, a mixture of maples, yellow birch and beech. I hired someone with a tip truck to haul them to the spot in a neighbours woodlot where they were going to be sawn. I'd rather not say too much about getting the truck stuck in the mud and the resulting fun we had getting the logs off. Then we needed a tractor to lift the logs on to the brow, a raised platform that the logs are rolled along and onto the saw mill.

The big day came last Thursday when the bandsaw mill arrived. The whole operation went quite smoothly, and in a few hours I had a trailer loaded up with boards and larger sections from which I can easily cut bowl blanks.


First thing on Friday morning the wood was delivered to my yard. It was quite a good work-out unloading them, as they are still quite sizeable chunks of wood. These are the boards, some nearly two feet wide.


I don't have space indoors to store boards this long, so I have to cut most in half and trim off the ends to remove any cracks. Then the ends are sealed to prevent further splitting.

Finally I have this pile of wood which is destined to make salad bowls, some of which will be much larger than anything I have made to date. From this photograph it is difficult to appreciate the size of these pieces of wood, but it is a real challenge for me to move them on my own.


I will post more pictures as work continues to show the many steps that go into making a big bowl.

technorati tags: , ,

Saturday, May 21, 2005

Curly Shavings

Apart from the pleasure of making beautiful artefacts, woodturners often delight in the shavings which pour off the cutting edge of their tools. A sharp tool, properly presented to the wood can produce long streams of shavings. This is often associated with turning 'green' wood, but here are some shavings I made while turning bottle stoppers from kiln-dried maple.

Ribbon shavings from the parting tool

These ribbon-like shavings are made by the parting tool as I rough out the cove.


Fine shavings from the spindle gouge

These fine spiral shavings are made by the spindle gouge as I refine the shape of the cove.


Bird's nest shavings from the skew chisel

These are my favourite! I like to think of them as delicate little bird nests or woven baskets. They come off of the skew chisel as I turn the very top of the bottle stopper.


Technorati Tags: , , ,

Sunday, February 27, 2005

Making inlays for weedpots

This past week I have been making inlaid weedpots. The photograph below shows some of the inlays in various stages of production.

Inlays being made for weedpotsThis batch of inlays are made of oak burl and black cherry burl.

The roughly cut round slices (right) are glued to circular blocks of wood (top right). These blocks are held in a chuck mounted on the lathe during the turning operation. The finished inlays (left) are carefully pried off of the glue blocks and are ready to be glued into the finished weedpot.

These weedpots are much admired by visitors to the studio. They are quite time consuming to make, so I like to build up a good stock before the busy summer tourist season.